
Pottery painting for beginners
Whether you're attending your first surf lesson, salsa class or pottery session; trying your hand at something new can be daunting, but being introduced to your new hobby in a clear, friendly and accessible way can make all the difference.
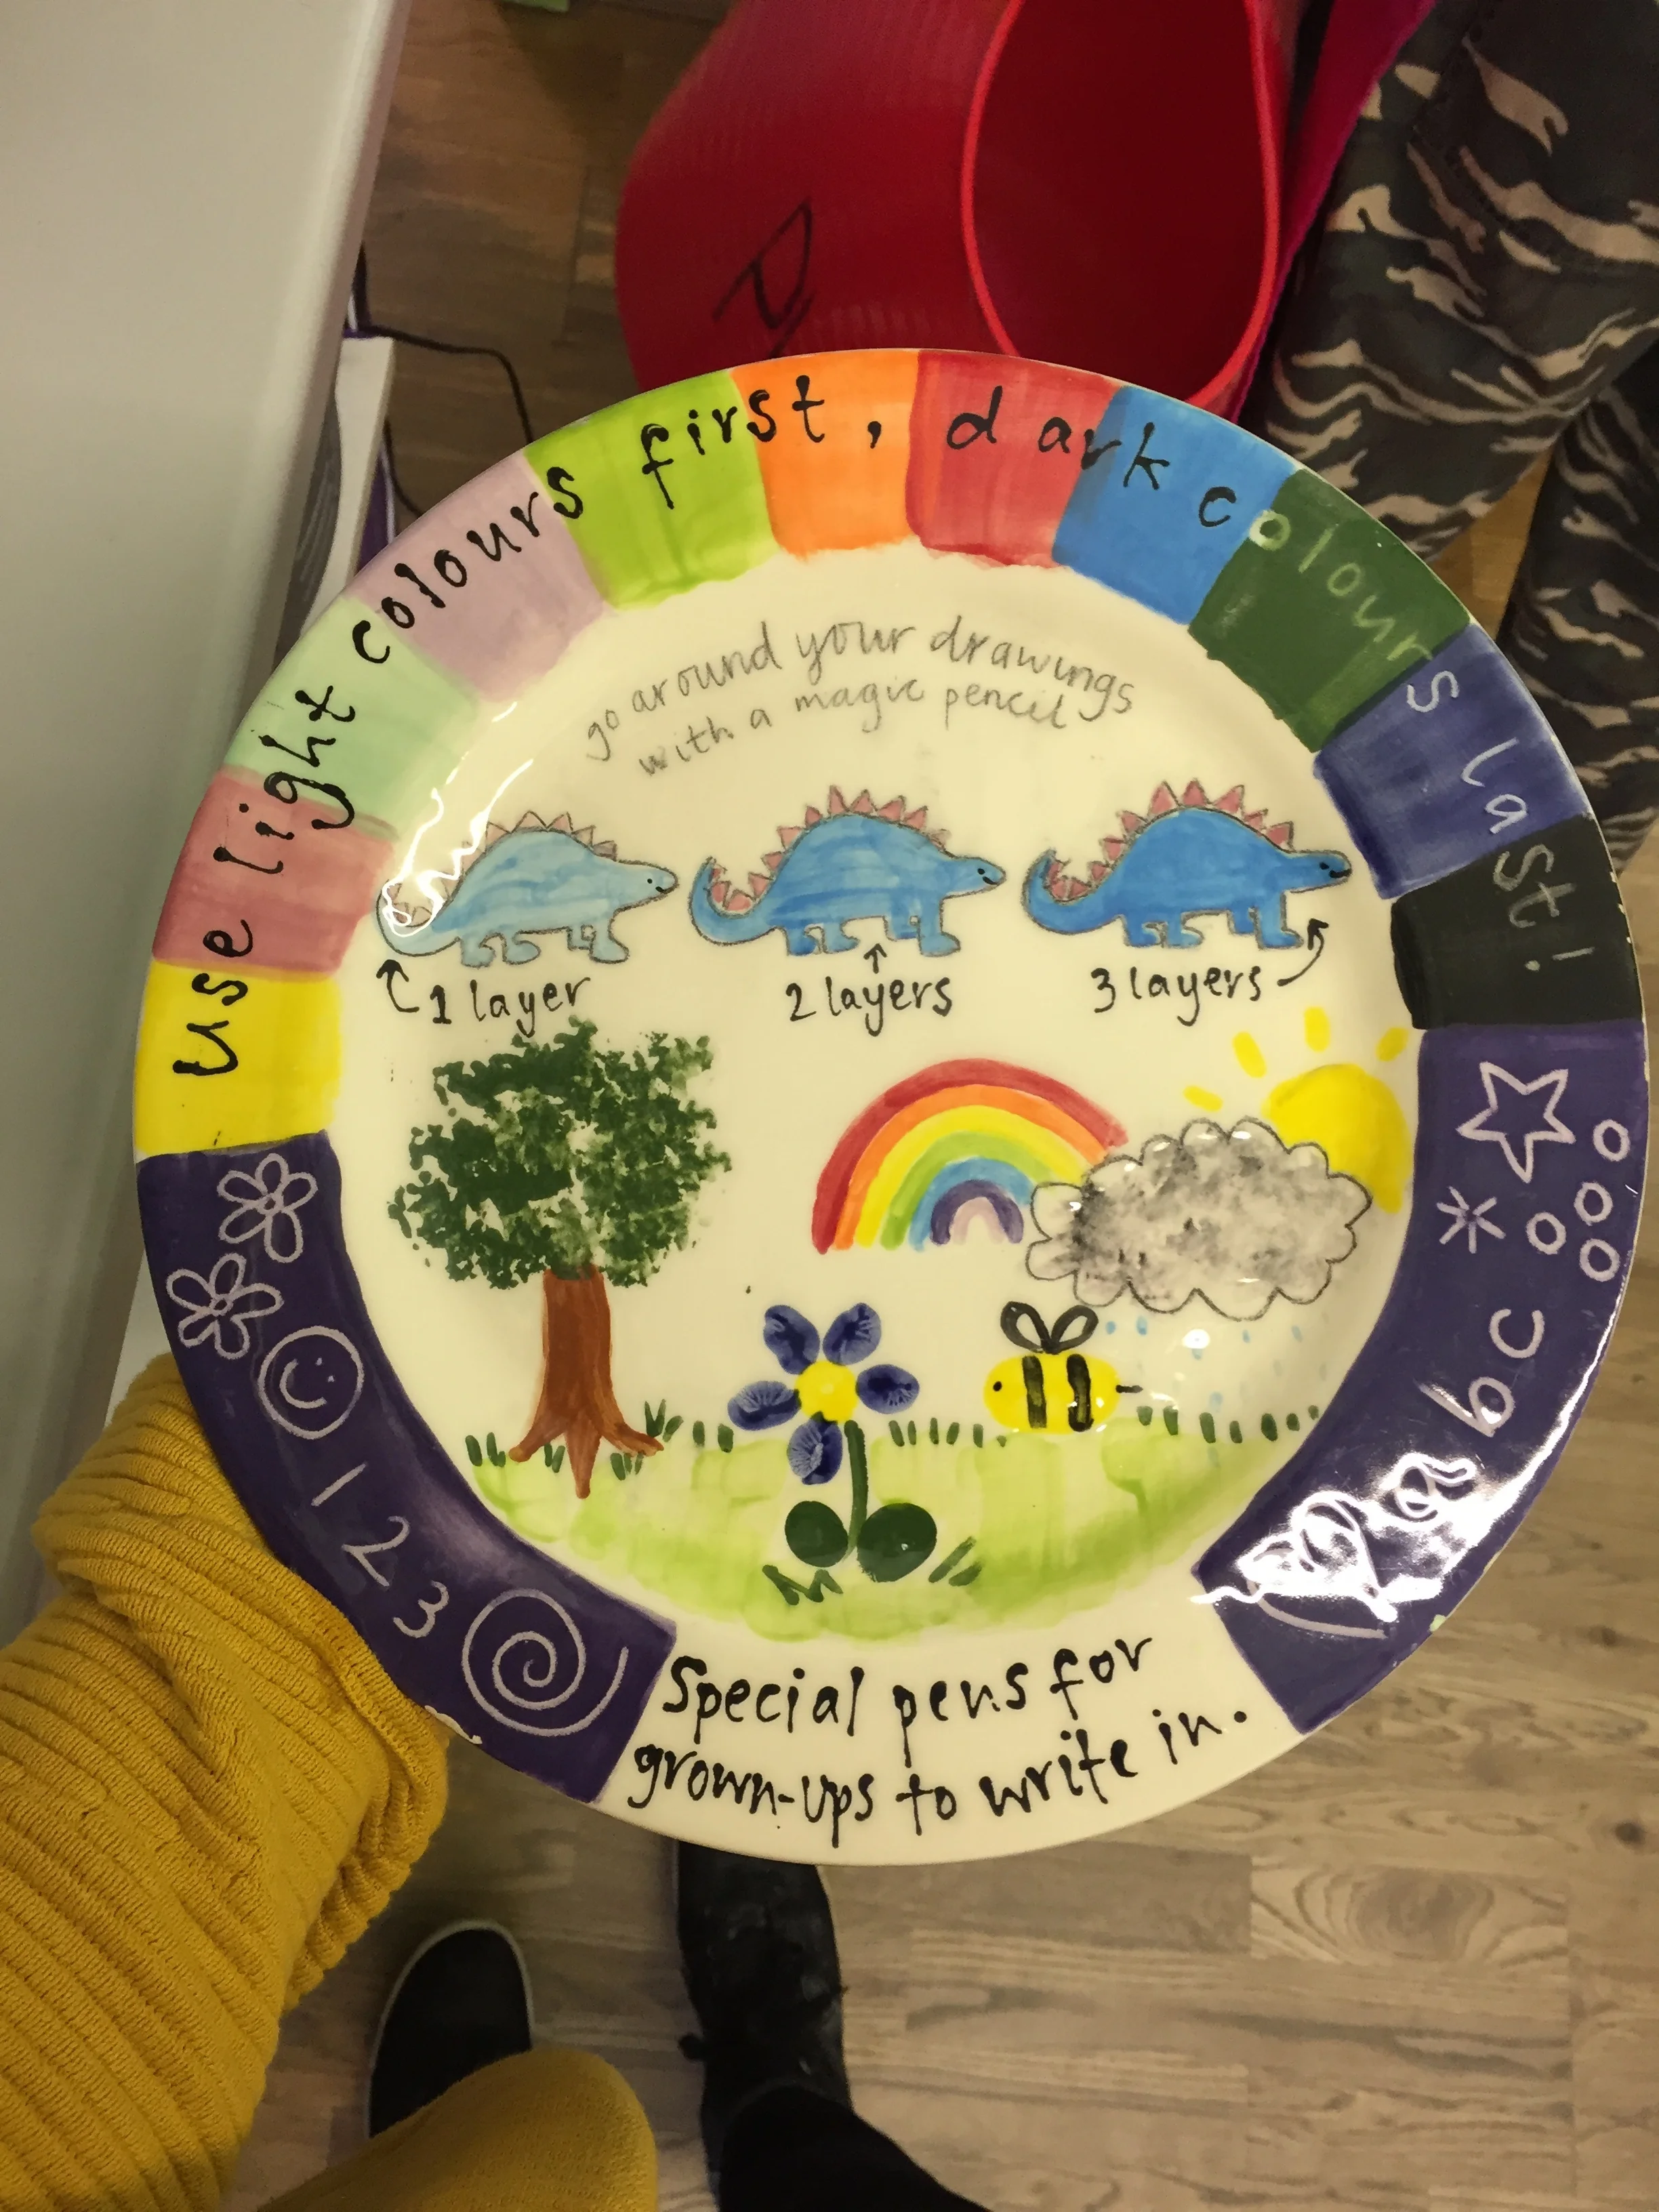
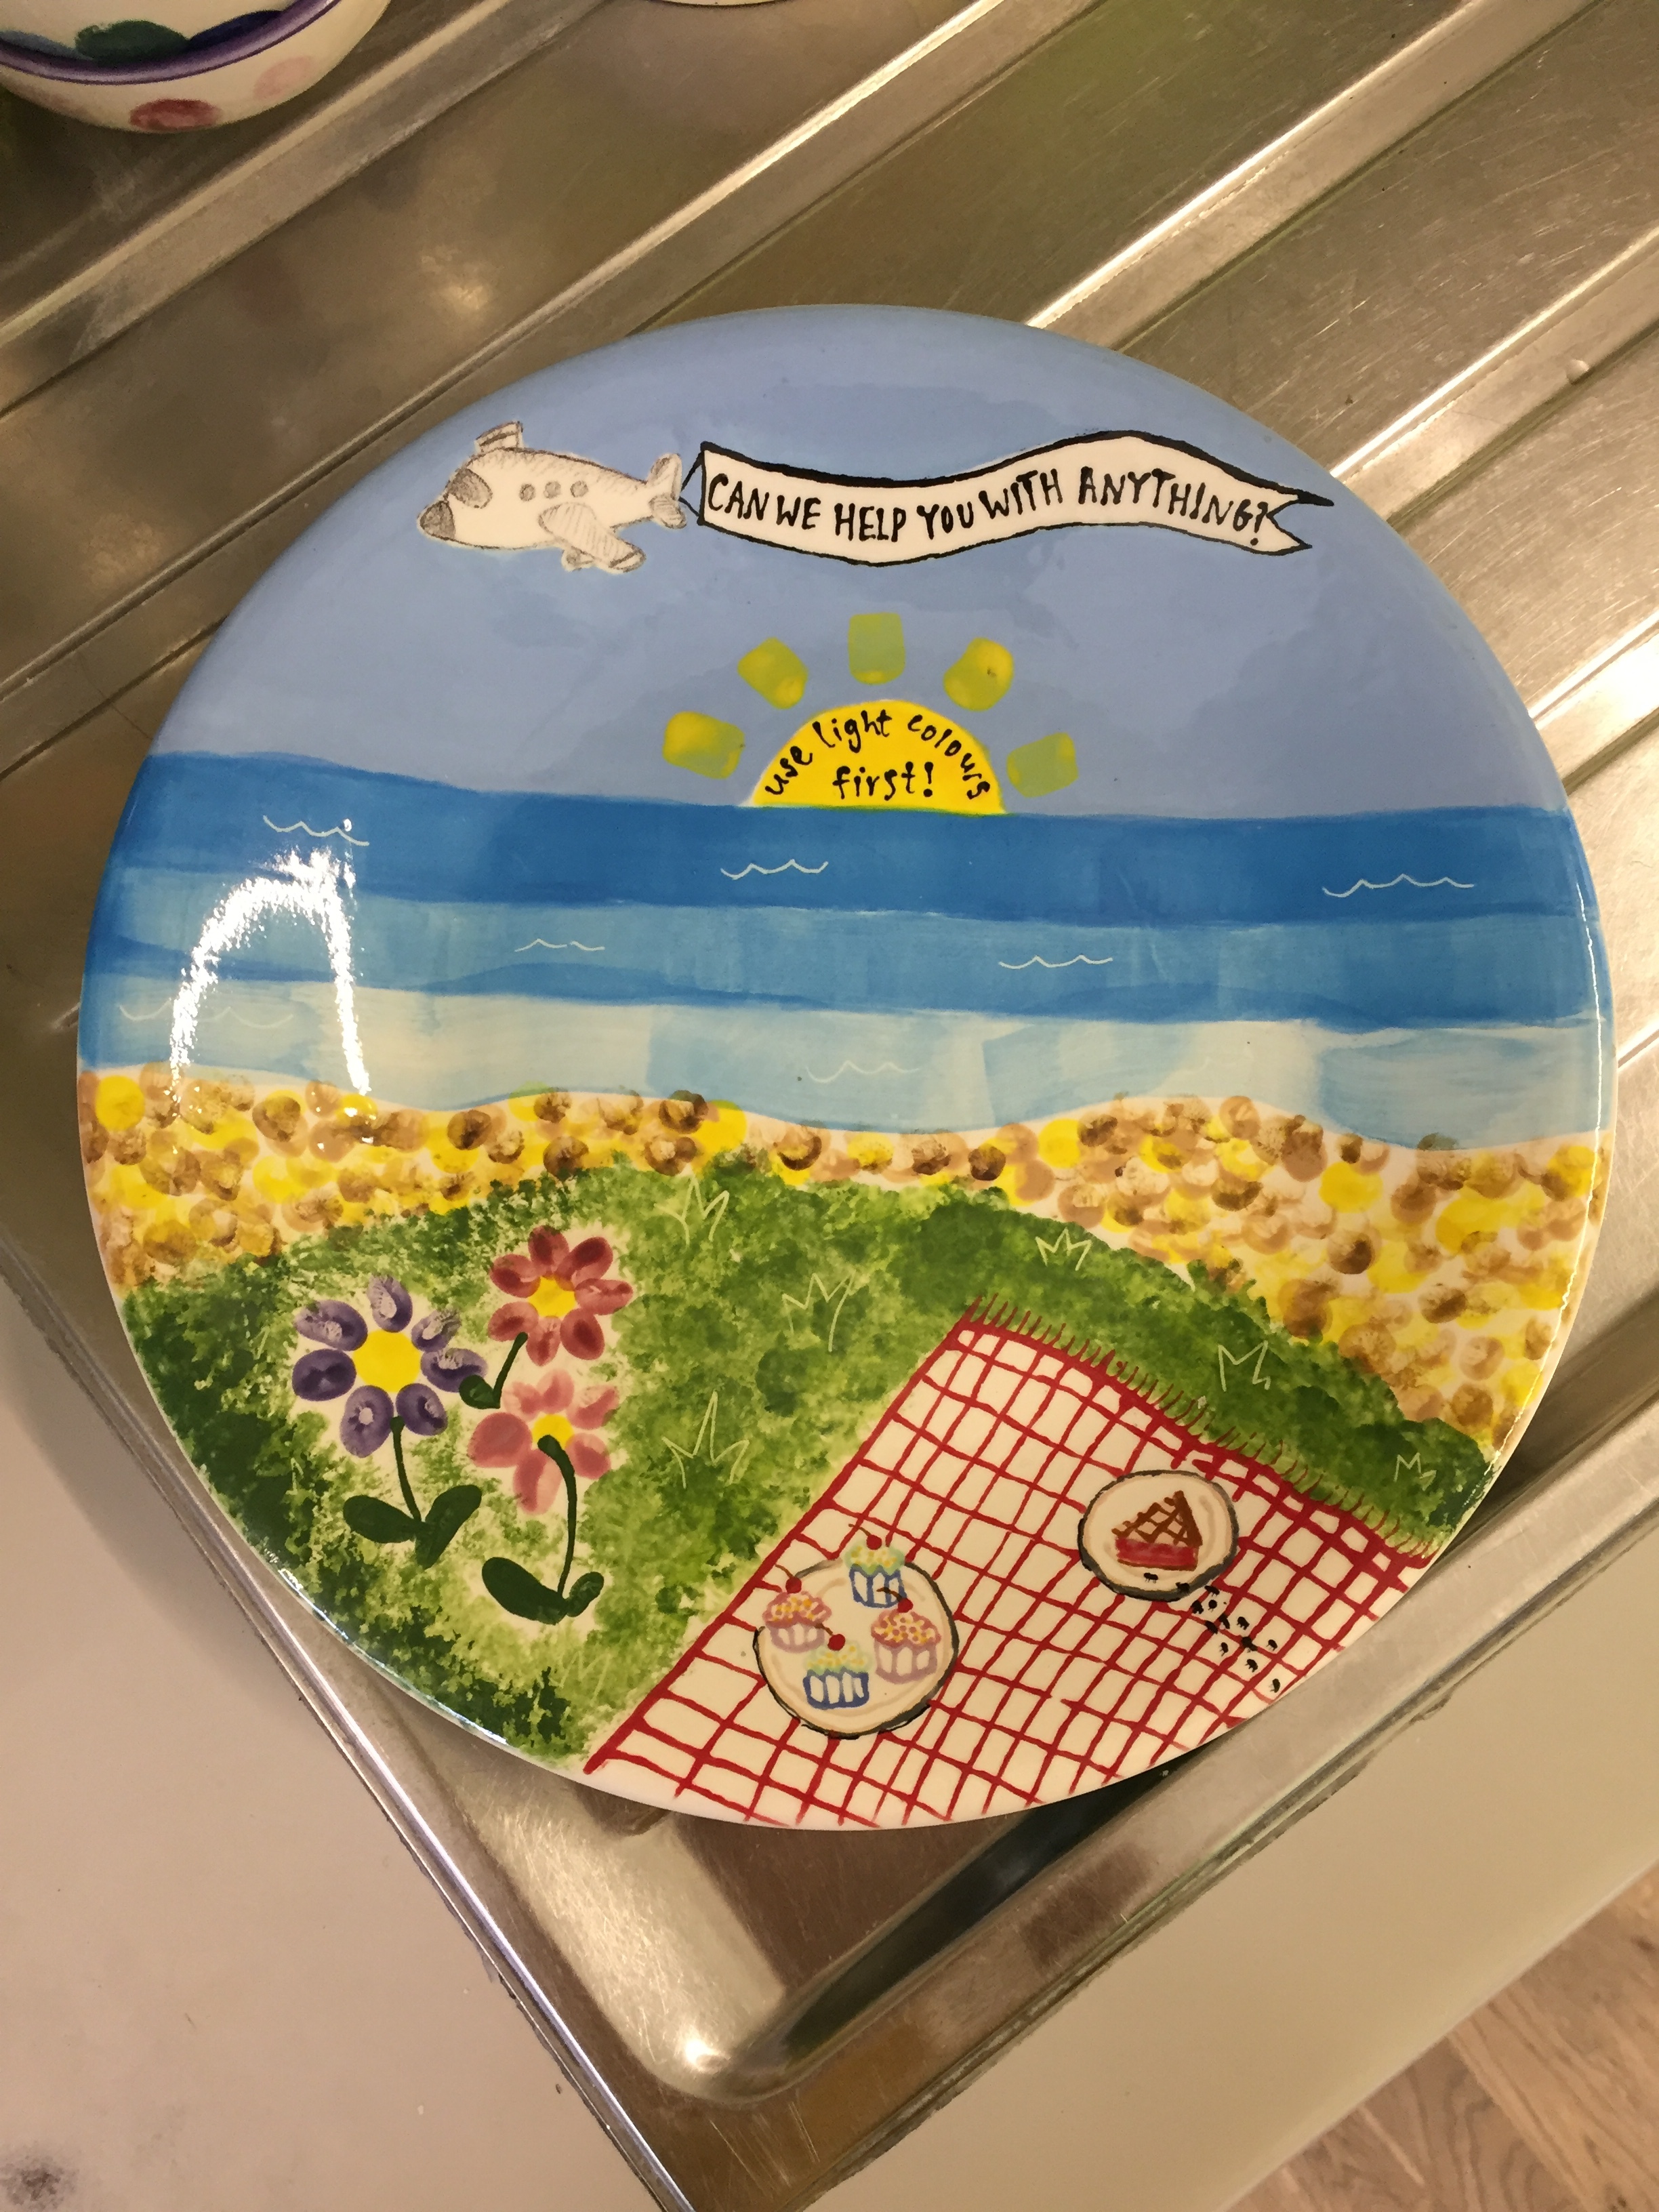
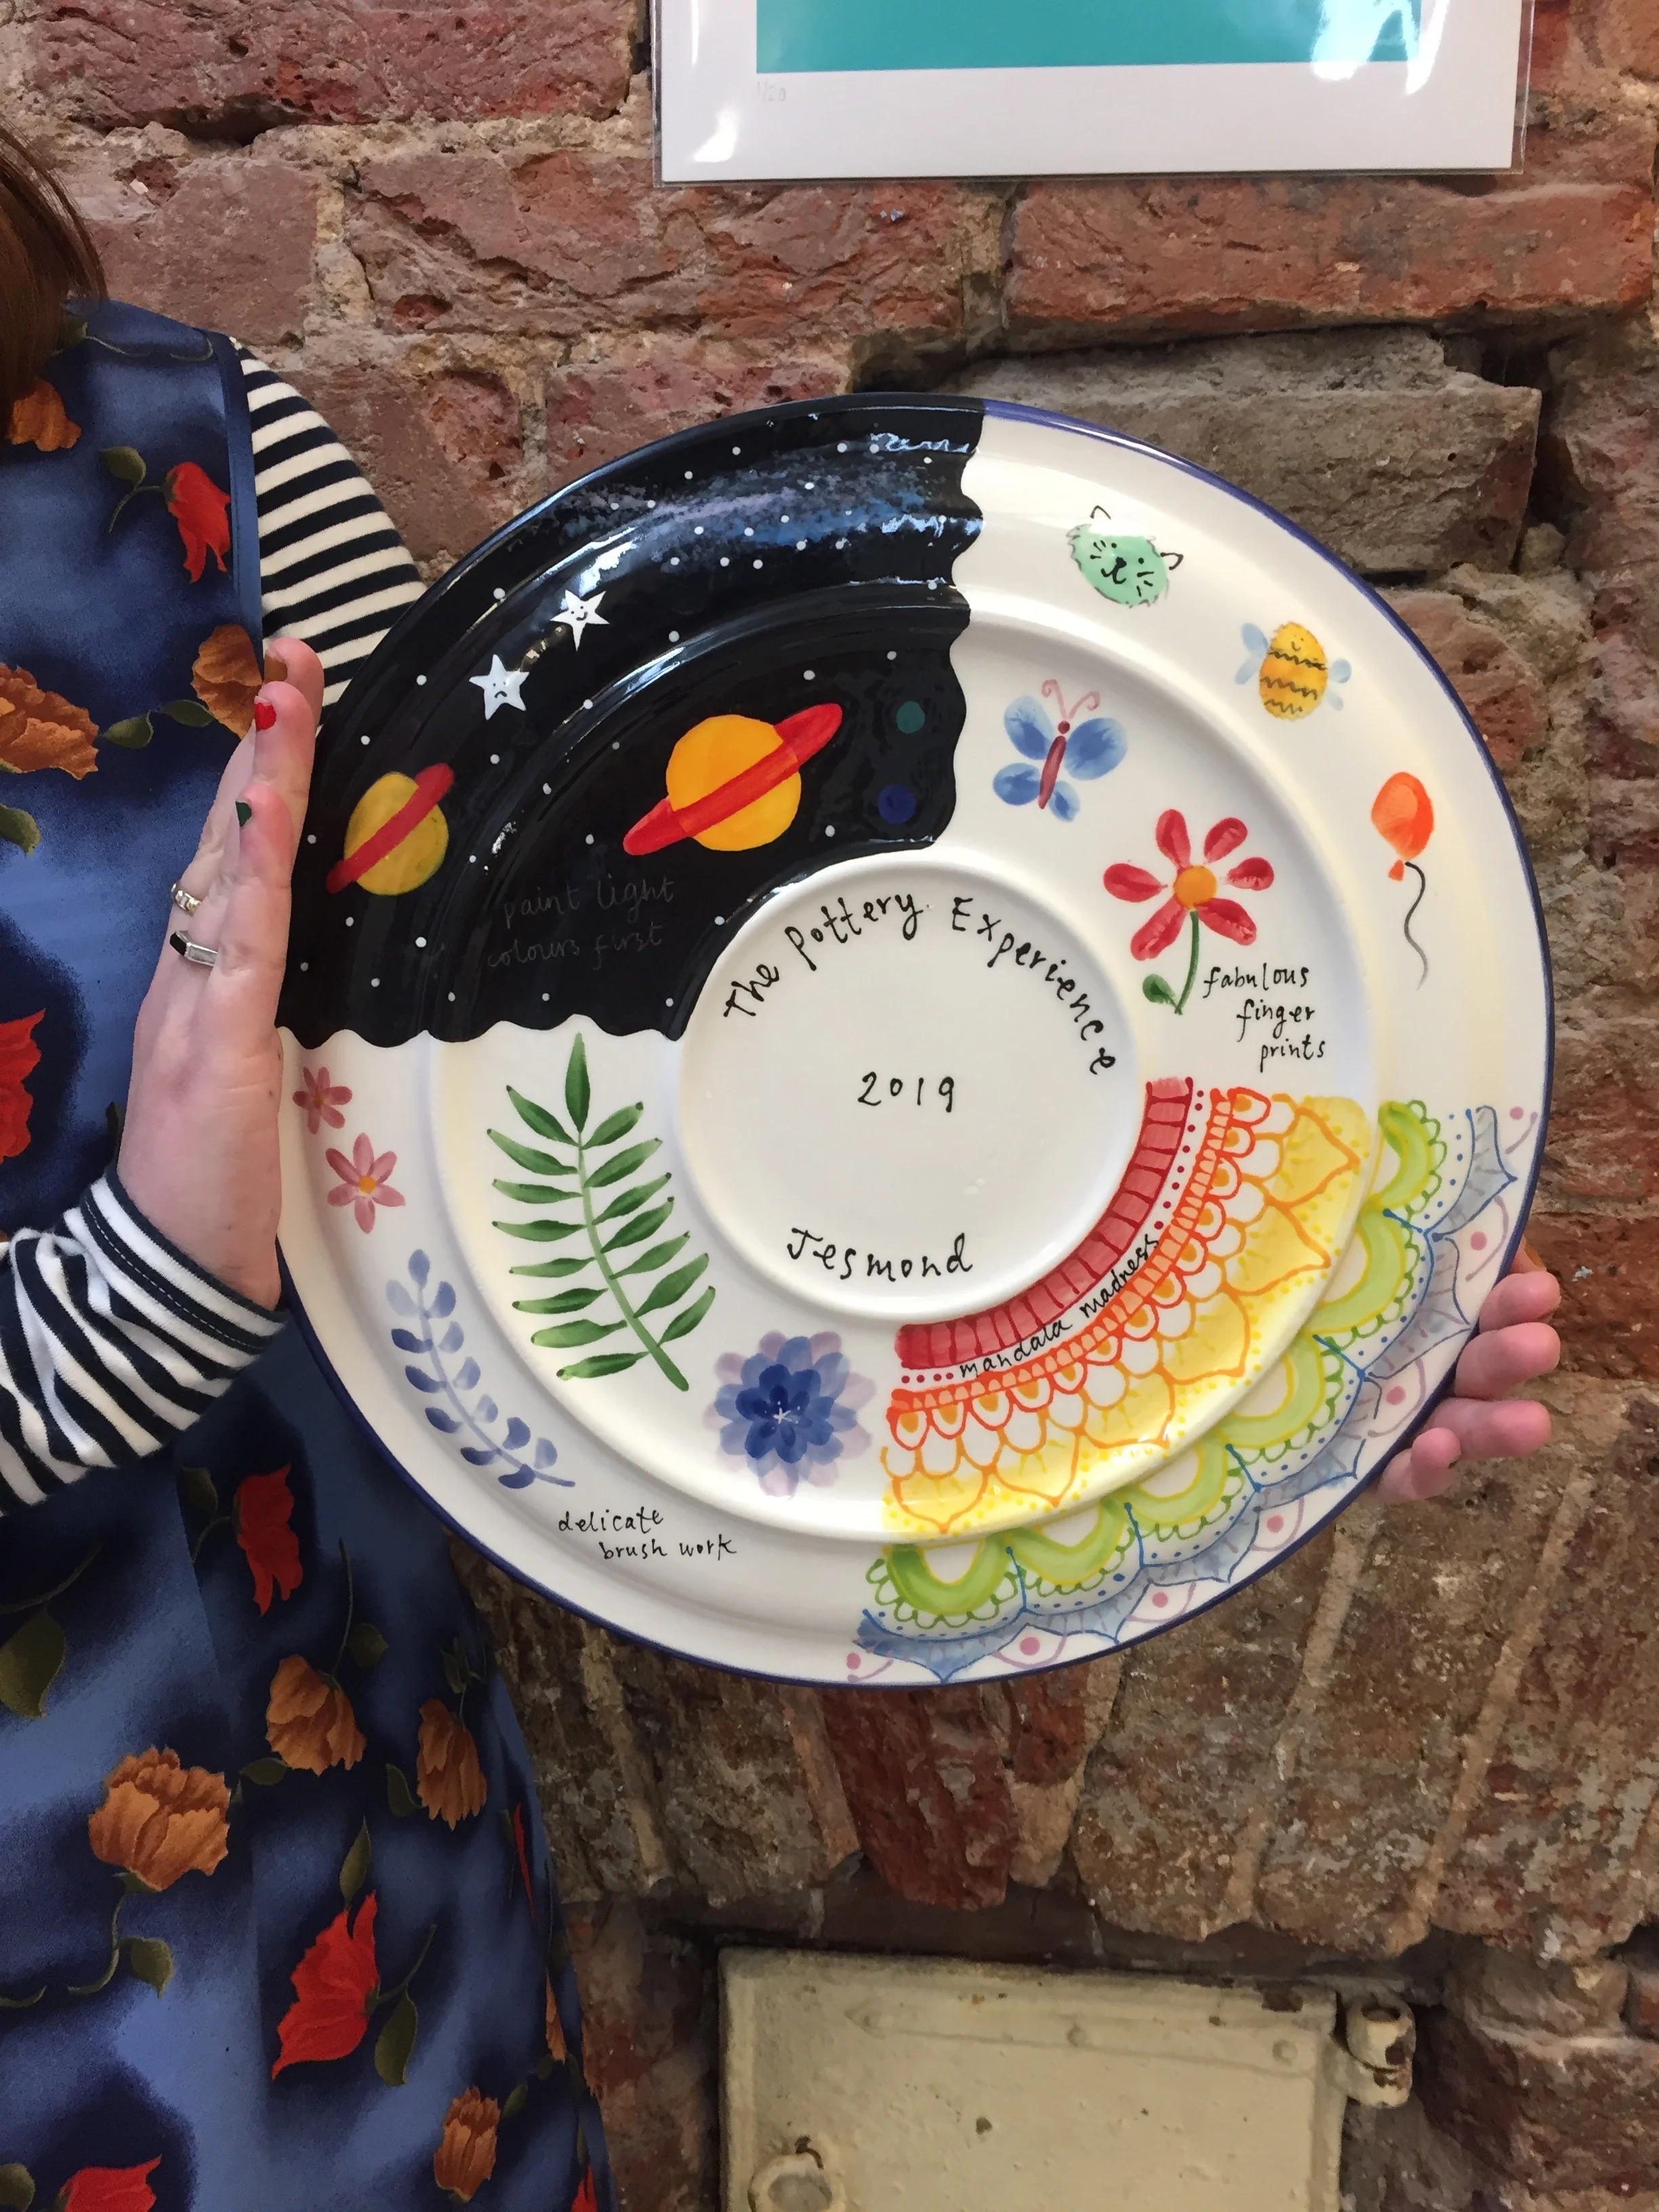
As with most crafts, there are so many techniques to experiment with it’s hard to know where to start when introducing someone to pottery painting- a single piece of pottery that demonstrates all your basic techniques in one place is as gooder place as any!
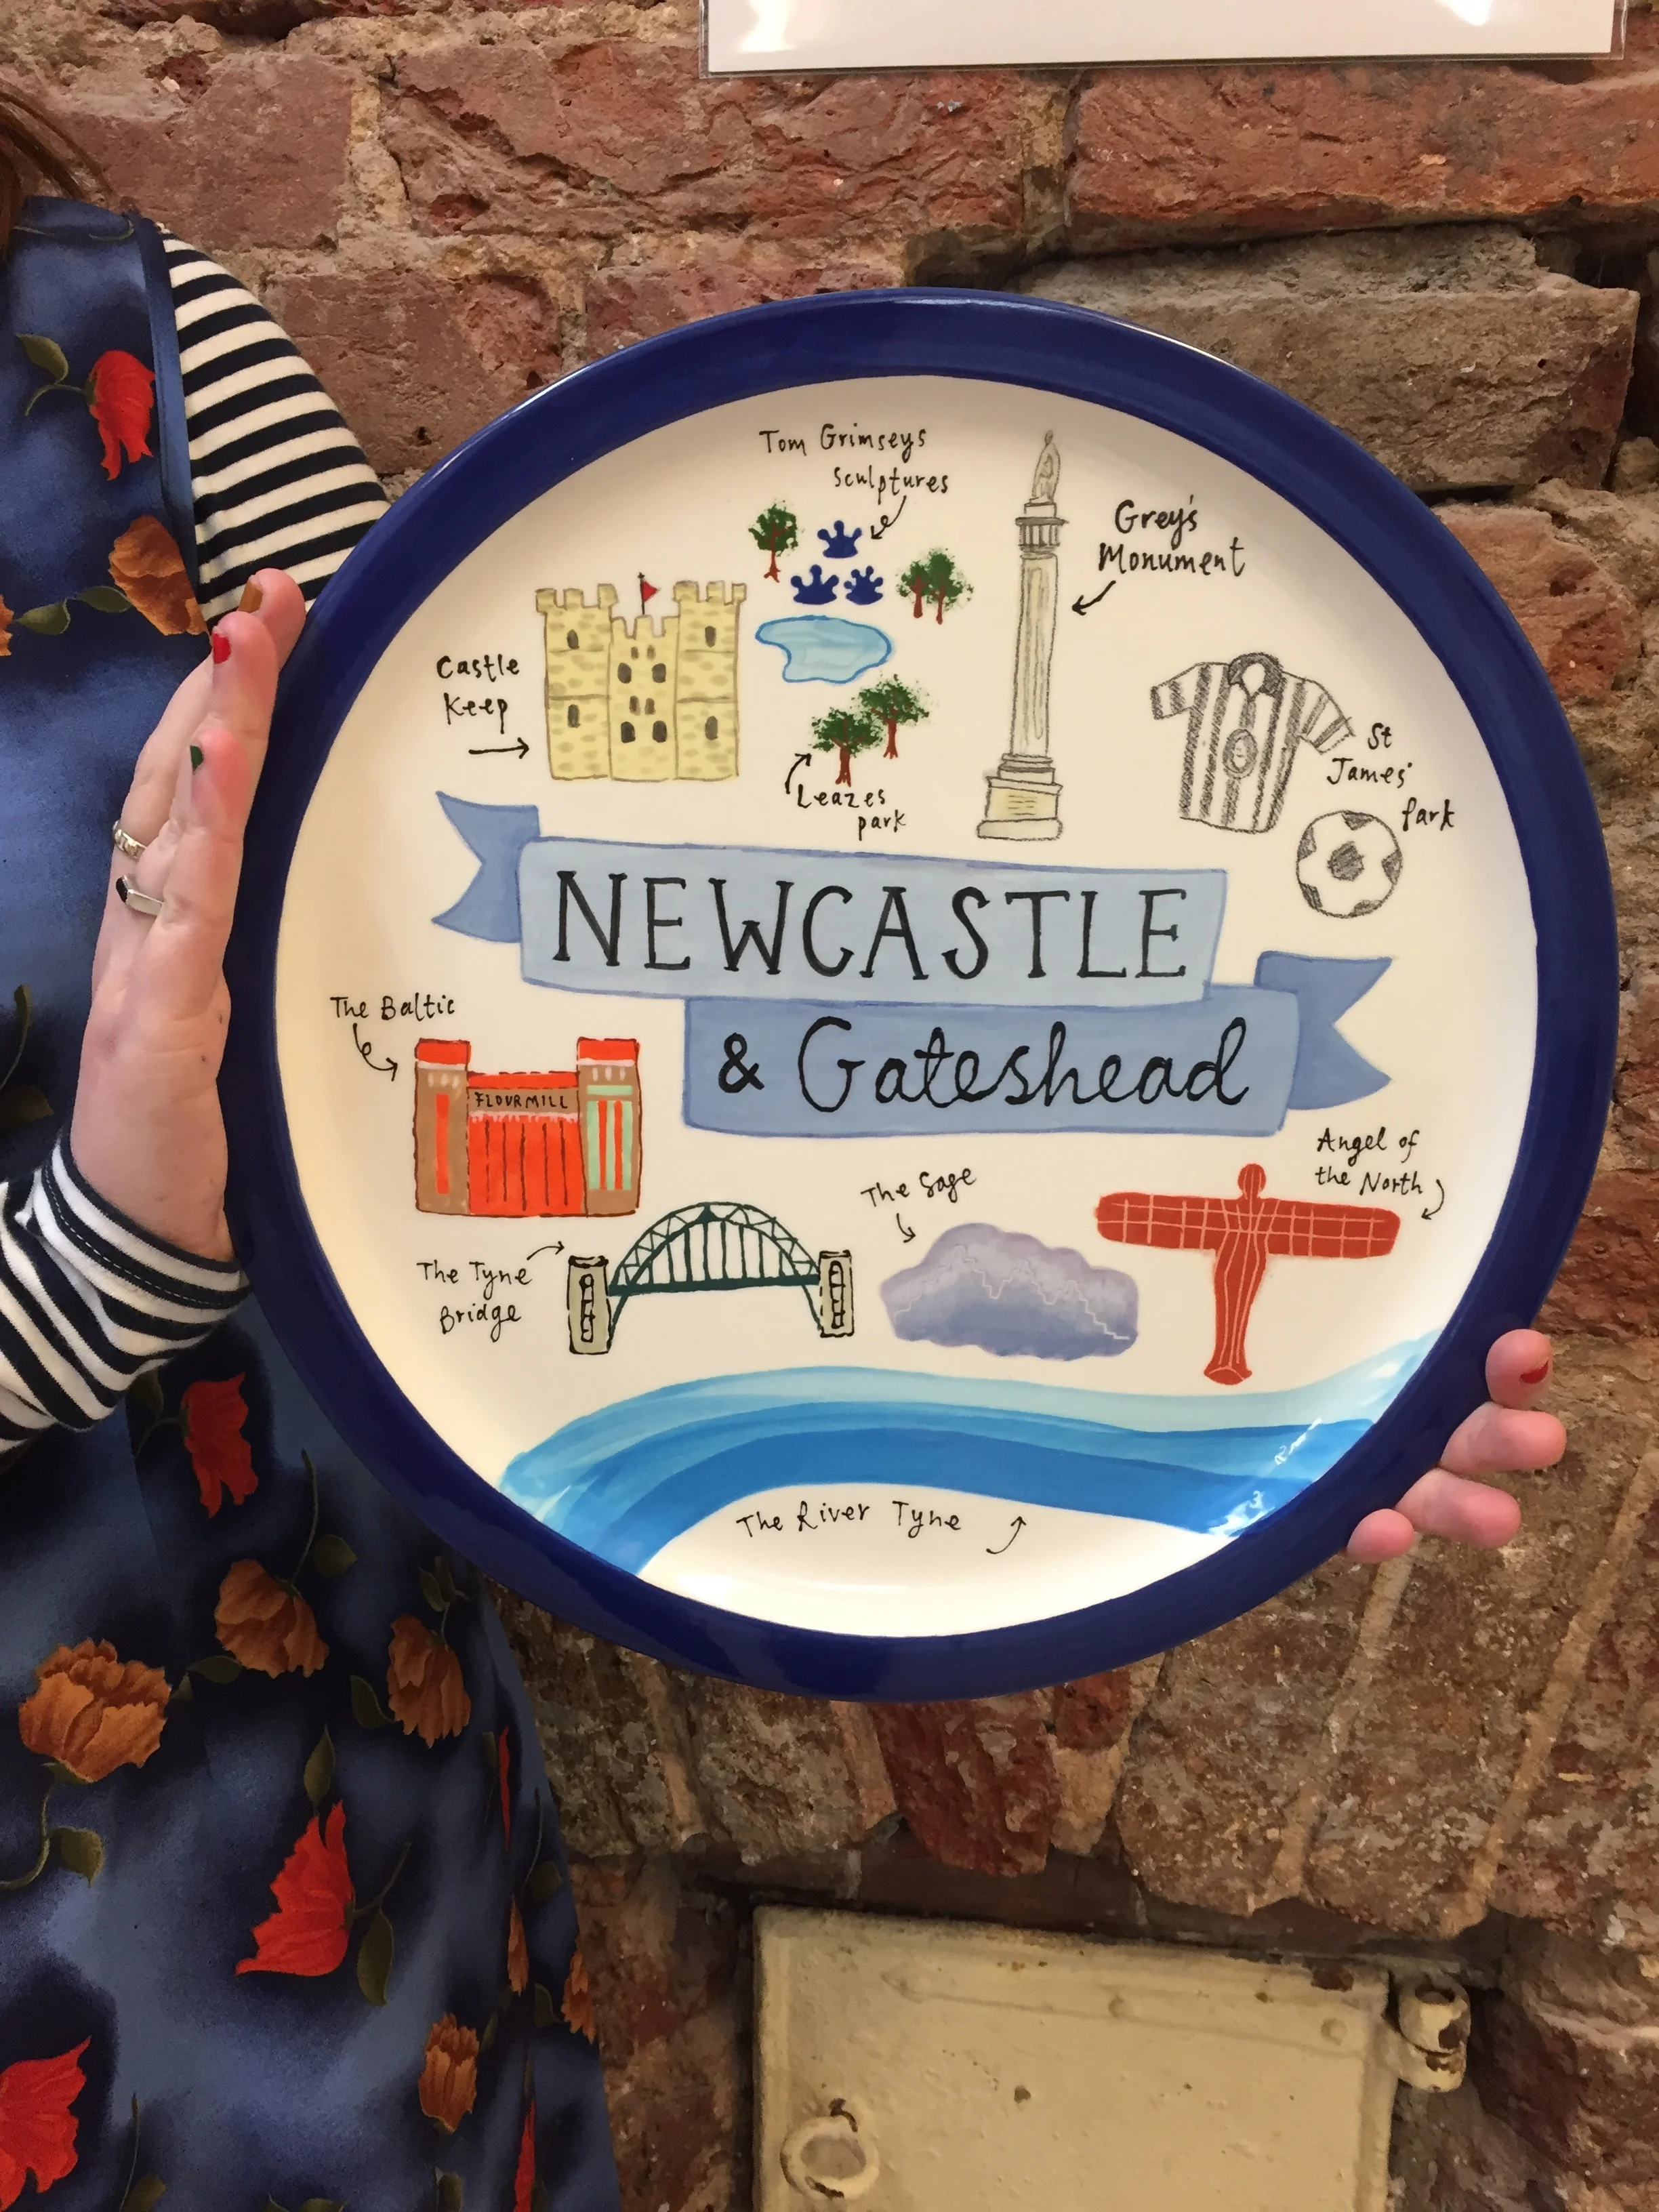
I first started designing what we’ve come to know as demo plates back in 2012 for The Painting Pottery Cafe. I was looking for an alternative to clumsily gathering several pieces of pottery to show customers pottery painting possibilities. Initially it was all about showing techniques, however over the years the team started to develop gorgeous plates that just so happened to illustrate the tips and tricks. Our favourite designs incorporated local landmarks fitting to our Brighton based locations, so it’s been so exciting to finally design a plate based on my beloved Newcastle Upon Tyne for The Pottery Experience!


How do you go about creating such a thing I hear you cry! Well, let me tell you…
The pottery painting process:
Designing and planning your piece:
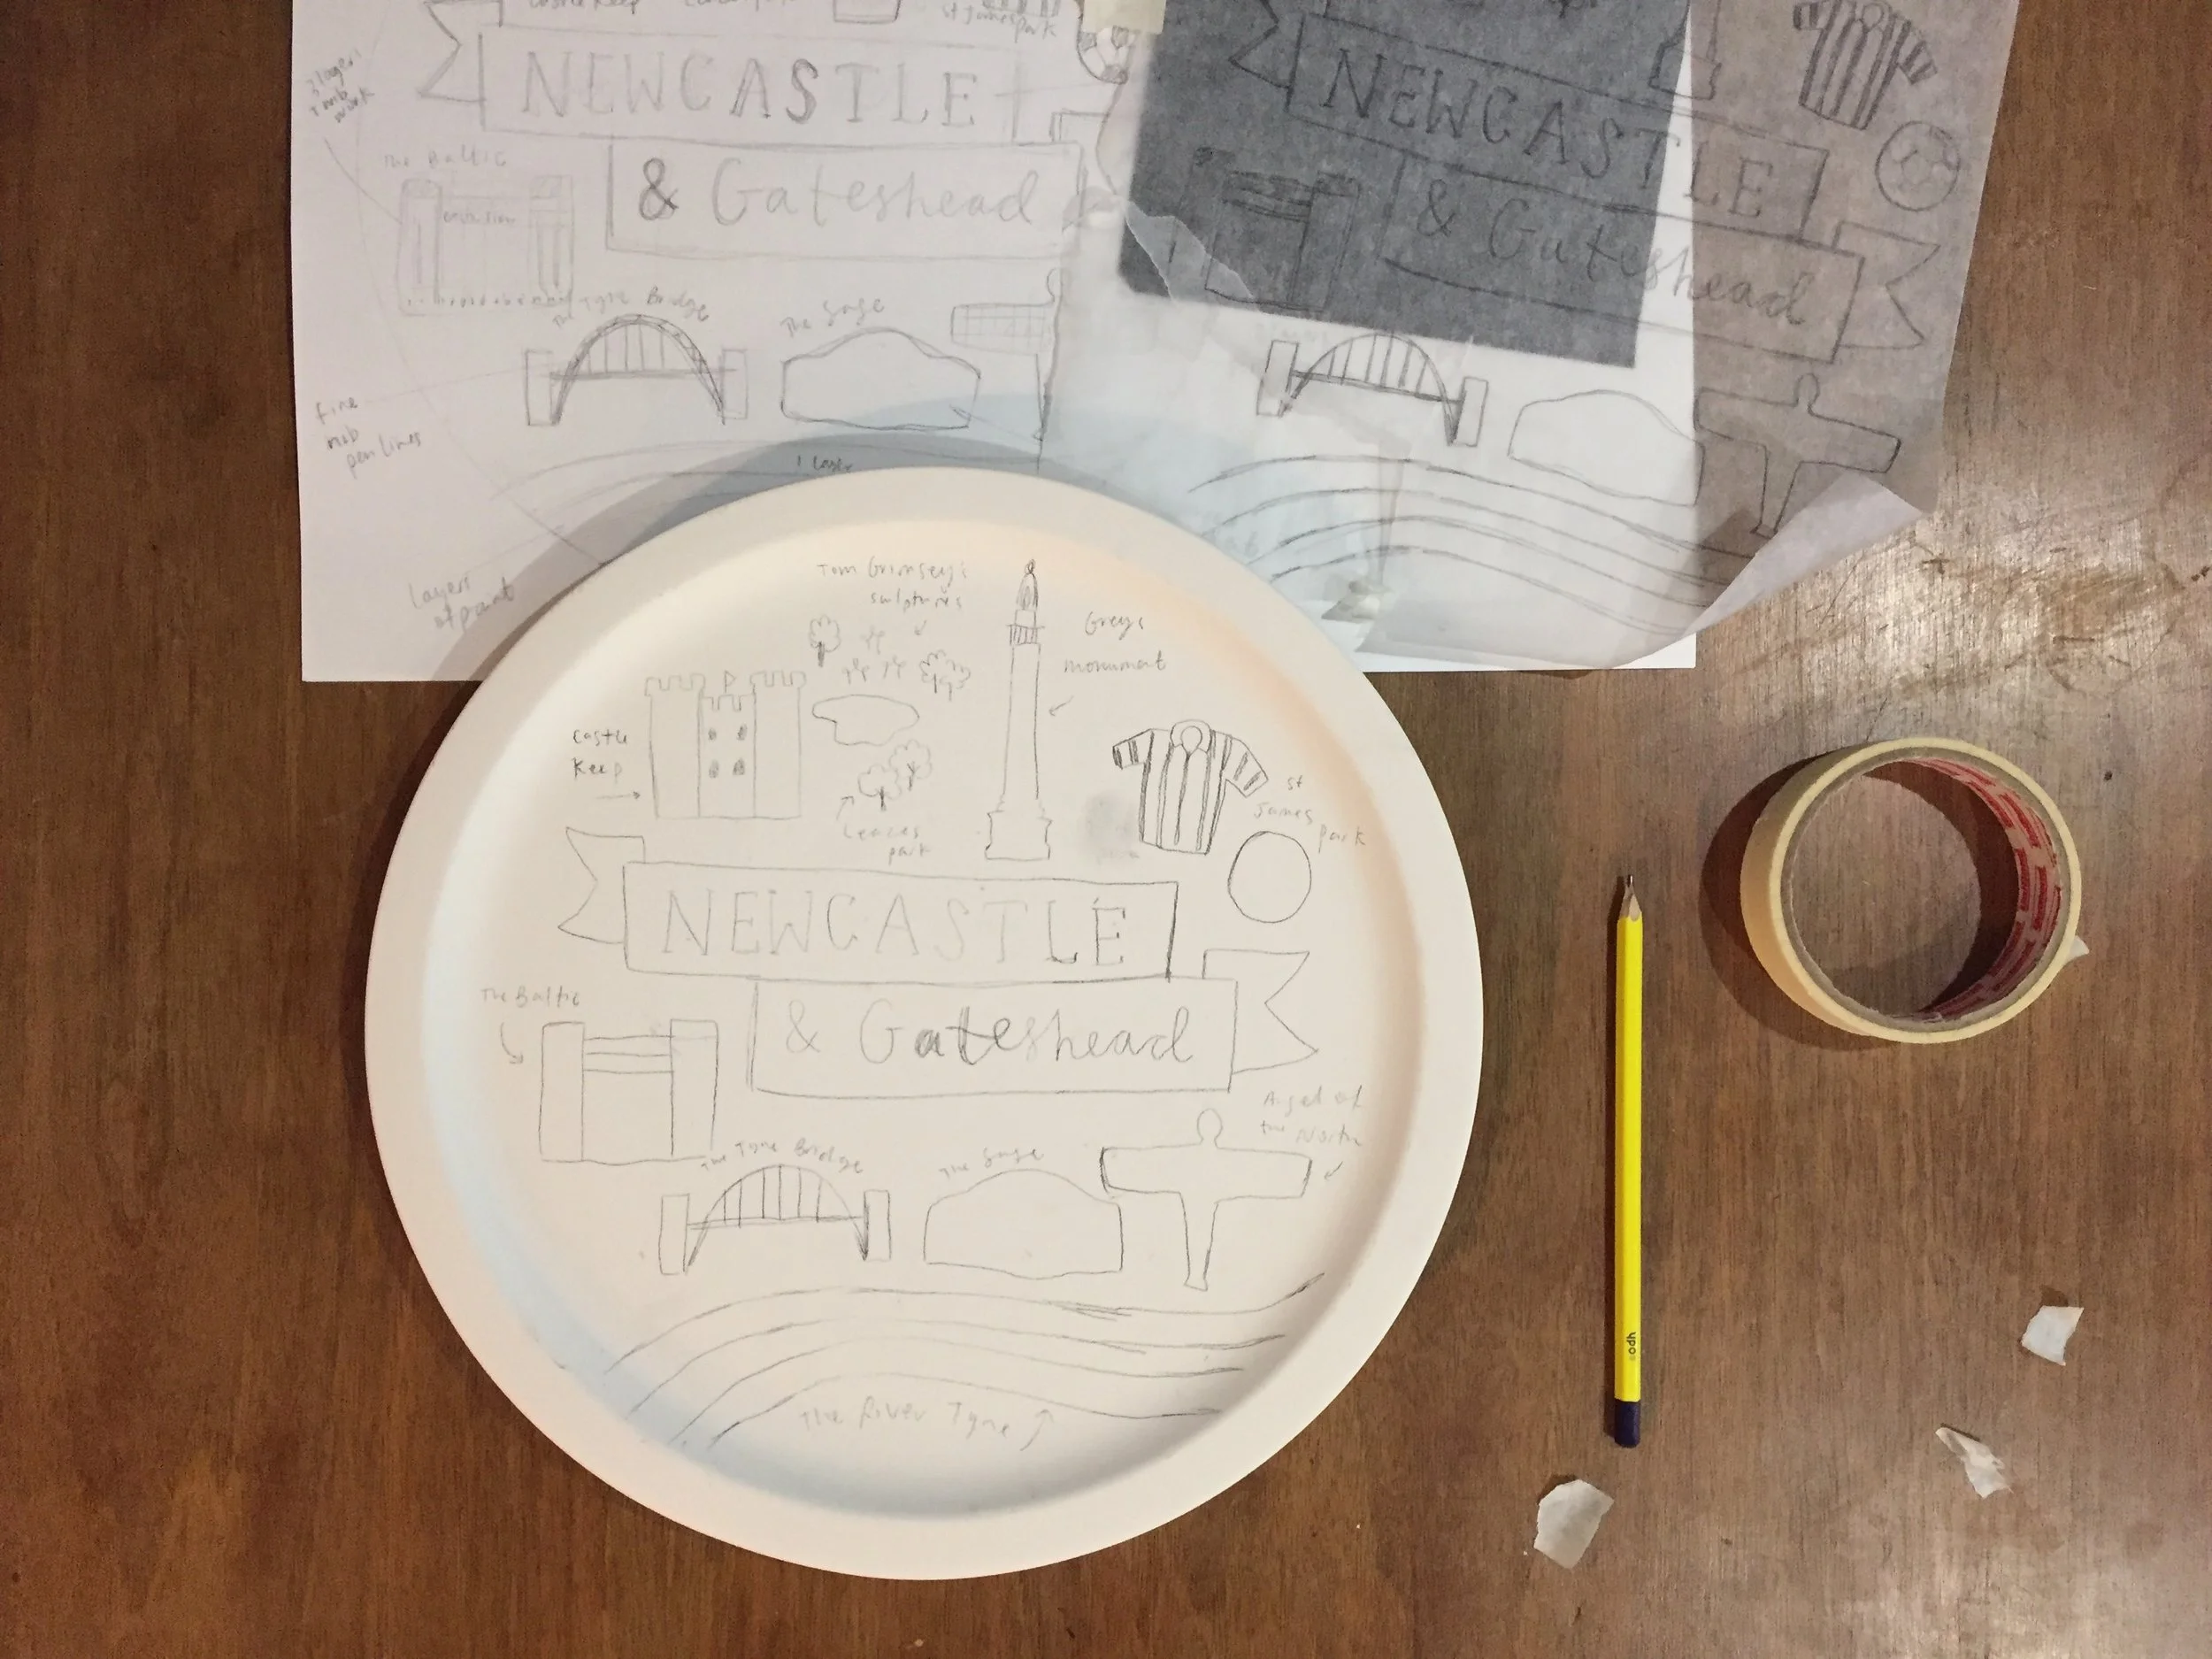
Pottery painting can be as simple or complex as you make it. If you’re just after a fun afternoon getting creative, you can arrive at the studio, pick a piece of ready-made pottery that takes your fancy, a design you like and you’re off! However if you’re creating something special like a wedding gift or birthday present you might like to arrive with a rough sketch plan. Because a demo plate needs to incorporate lots of techniques I planned it out on paper beforehand to make sure it could fit everything on.

Transferring your design on to your piece:
The first thing you need to know here is that pencil lines disappear in the kiln when they are heated up to almost 1000°C. This means you can sketch lightly directly onto the pottery, use the old fashioned tracing method, or carbon paper to get a design onto your pottery, safe in the knowledge it will vanish during the firing process. In this case I traced my design onto tracing paper, so as not to damage my original drawing, and then used carbon paper to transfer the design on to the plate.
Painting your piece:
Once you’ve got your design on your piece it’s simply a case of choosing your colours and filling in the gaps. Before you start we’ll give you a full demonstration using one of our fabulous demo plates. I’ve tried to squeeze as many different techniques on our demo plate as I could to show you lots of possibilities. You can see examples of a few of these techniques on our Instagram including writing with fine liners and a super satisfying method of adding bands of colour. In the coming weeks I’ll be writing about some of the landmarks and techniques we’ve chosen.
Glazing and firing your finished piece:
Once your finished painting your piece you’ll leave it with us to be glazed and fired. This will transform the colours from pastel shades to rich bold colours. You can see the whole process documented below ⤵


Fancy having a go? Start your pottery painting adventure with The Pottery Experience.